
This document is based on a presentation I did for the grad student organization for the Department of Integrative Biology, UW–Madison in Fall 2017. I’ve made a few changes to hopefully make it more transparent as a stand-alone document.
Why use git and GitHub?

- To avoid the situation above!
- Collaborating with a team
- Sharing code with strangers
- Tracing and avoiding horrible mistakes
git and GitHub overview
- The “working directory” is the folder containing the actual files you’re interacting with.
- After you save changes to the working directory that you want to keep, you must
then add these changes to the “staging area” using
git add. - The staging area is where you temporarily store changes you might want to eventually add to your “local repository”. It’s very easy to remove these changes from the staging area before any future steps because they’re not yet in the repository.
- Once you’re satisfied with the changes that you’ve added to the staging area, you
add this set of changes to the local repository by using
git commit. - The local repository stores the history of this directory as you’ve chronicled using git.
- Each commit can be thought of as a snapshot of the directory, where you control what’s being looked at.
- Your control comes in when you decide what changes to add to the staging area before committing. This can be really useful for keeping changes in the same commit if they are from the same section of a program or set of analyses.
- To update a “GitHub repository” based on some changes you’ve made and committed
in your local repository, you push them to GitHub using
git push. - To update your local repository based on some changes someone else has made, committed,
and pushed to the GitHub repository, you pull them to your local repository
using
git pull.
Prerequisites
Today’s goals
- Tell git who you are
- Connect securely to GitHub
- Create a test repository
- Clone, commit, and push your repository
1. Telling git who you are
In RStudio, Tools > Shell...
Set global defaults for name and email. Make sure the email below is the one you use for your GitHub account
git config --global user.name 'John Doe'
git config --global user.email 'john@doe.com'
Verifying that above worked by checking global git options:
Output from this command…
git config --global --list… should include this:
user.name=John Doe
user.email=john@doe.com
2. Connecting securely to GitHub using SSH
First, check if you already have an SSH key
From R:
file.exists("~/.ssh/id_rsa.pub")
# Windows:
# file.exists("C:/Users/USERNAME/.ssh/id_rsa")
If FALSE, you need to make a public key first…
2.1 Making and viewing key
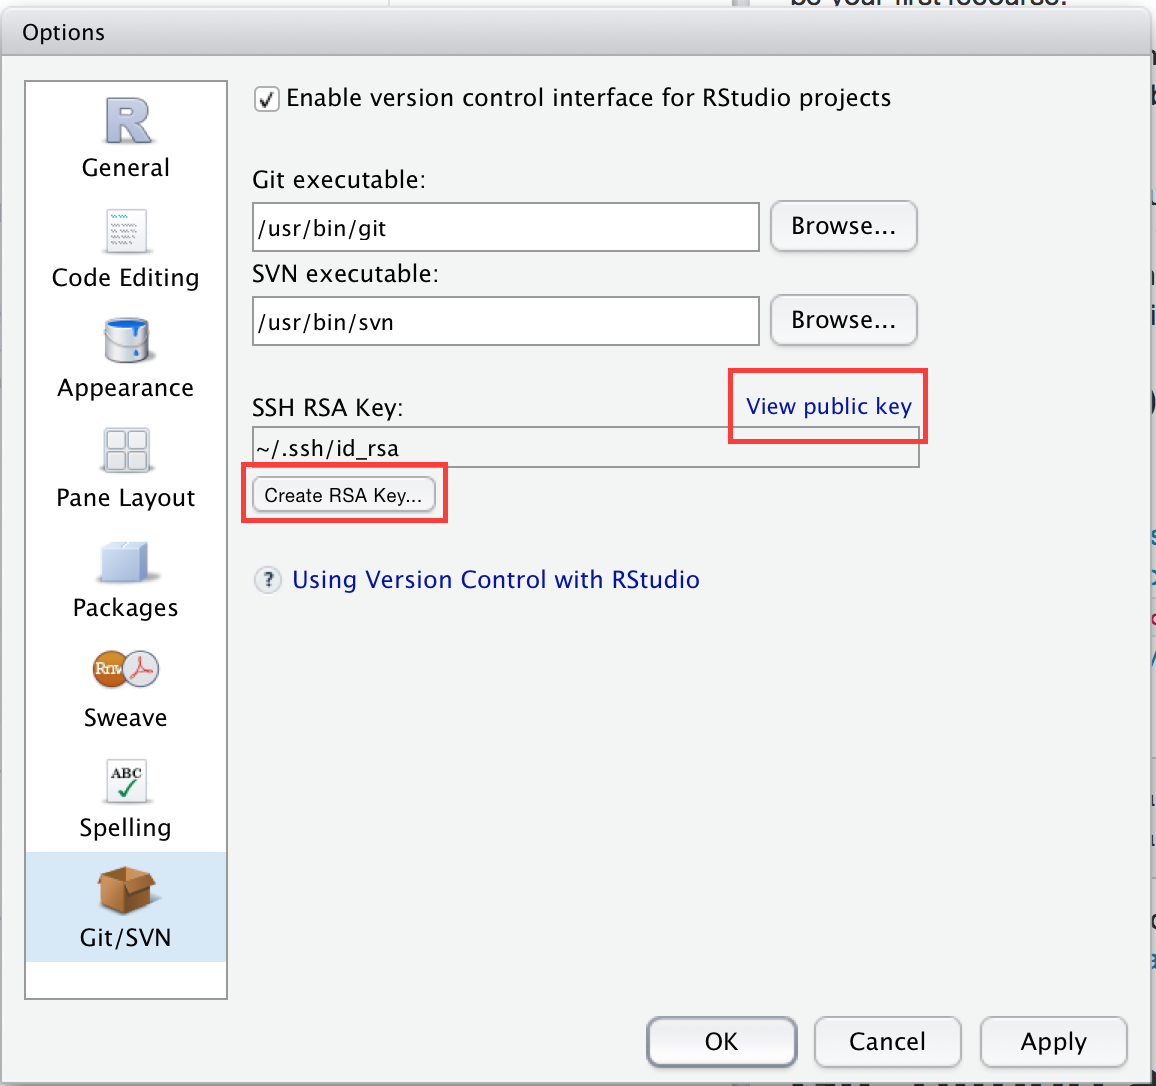
(image from https://r-pkgs.org/git.html#git-setup)
- Click “View public key” to see if you have one yet.
- If not, then generate one by clicking “Create RSA Key…” (you don’t generally need a passphrase).
- Click “View public key” and copy the key for the next step.
2.2 Adding key to GitHub
Login to github.com in web browser
Go to https://github.com/settings/ssh

Enter a descriptive title (e.g., “Personal MacBook Pro”)
Paste your key into the “Key” box

3. Create a test repository
3.1 Initiate new repository
From github.com, hit “New repository”:

From profile page, hit “New”:

3.2 Describe and create new repository
If you want to actually use this repository for existing files, replace
awesome_name with something useful.

* If not using R, leave at “None” or change to language you’re using
4. Clone, commit, and push your repository
4.1 Clone repository in RStudio
File > New Project > Version Control > Git

Replace lucasnell with your GitHub username, and awesome_name with your repository’s
name.
4.2 Make local changes
If just using a test repo, edit the README.md file and save changes.
If wanting to move a directory over to GitHub, copy those files into the new repository’s folder
4.3 Commit and Push
- In RStudio, under the “Git” tab, checked “Staged” for file(s) that you changed or added
- Hit “Commit”
- Add useful commit message
- Hit “Commit” again
- Hit “Push”
If the above works, then you’re successfully using GitHub through RStudio
Additional resources
- Source of info for much of this presentation:
happygitwithr.com - GitHub Education (for free private repos):
education.github.com - Simple command line guide:
rogerdudler.github.io/git-guide - Recommended git clients (RStudio isn’t great to use long-term)
- GitKraken:
gitkraken.com - SourceTree:
sourcetreeapp.com
- GitKraken:
- This presentation is available at
lucasnell.com/github_gsis